Yesterday was day 3 of “Oh What Fun It Is To …” Yes, I’m a bit behind with my “Create” post, but better late than never! Check out all of yesterday’s creative craft ideas over at The Tichenor Family.
Nick and I like to exercise our creativity in the kitchen, and our contribution to the “Create” link up is no exception.
Last Saturday morning when we woke up, Nick asked if we had red food coloring. We were having friends over for a dinner party that night, and I had no idea what he had up his sleeves. All I knew is that we had to roast sweet potatoes and apples for soup, and I had to bake a cake. So you can imagine my surprise when he declared that he was going to bake Santa Bread.
Yes, my husband has baked dozens of breads over the past year (see sourdough bread, focaccia bread, and French baguettes), but one in the shape of Santa Clause? I was intrigued.
First he combined flour, sugar, yeast, and salt in a large bowl. Next he heated milk, water, and butter on the stove top. Then he mixed everything together to form the dough. After kneading it for 5 minutes with our electric stand mixer, he formed it into a ball and let it rise for 1 hour.
Then the fun began!
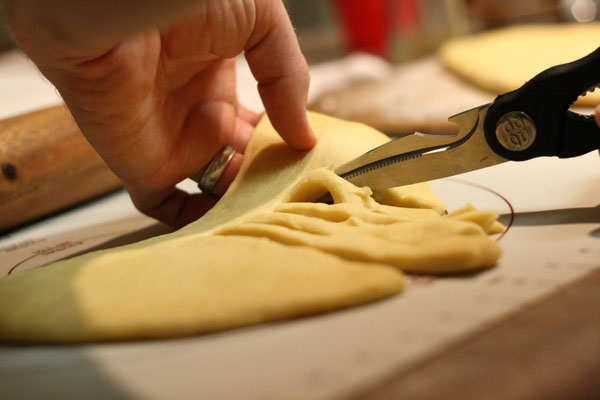
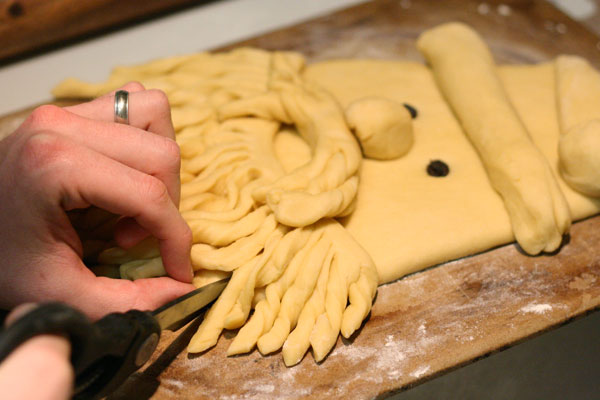
He shaped the dough into Santa’s head and hat, and he used scissors to cut strips for the beard.
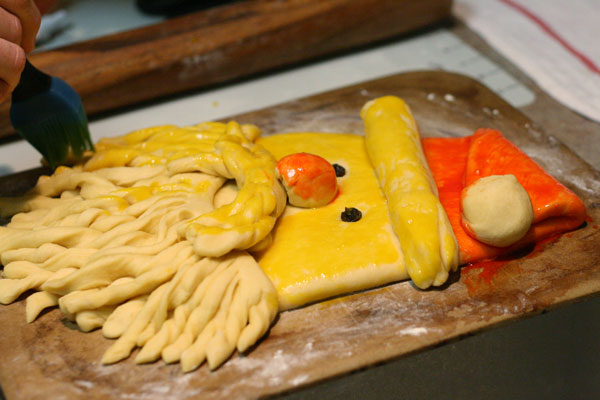
He used the remaining dough to form the mustache, the nose, and the pom-pom and brim for the hat. And he pressed raisins into the dough for eyes.
The he brushed red food coloring + egg yolk over the nose, cheeks, and hat. And voila!
After about 25 minutes in the oven, Nick revealed the cutest (and tastiest!) jolly old Santa Clause just as our guests were arriving. He never ceases to amaze me — that husband of mine.
This bread is easy to make and would be a fun family activity to do as we count down the final days until Christmas!
Santa Bread
Makes 1 loaf.
Ingredients
- 4 to 4-1/2 cups bread flour
- 1/2 cup sugar
- 2 packages (1/4 oz each) active dry yeast
- 1 1/2 teaspoons salt
- 1/2 cup milk
- 1/4 cup water
- 1/4 cup butter, cubed
- 2 eggs
- 2 raisins
- 2 egg yolks
- 2 to 3 drops red food coloring
Directions
- In a large bowl, combine 2 cups flour, sugar, yeast, and salt. In a small saucepan, heat milk, water, and butter to 120°-130°F. Add to dry ingredients; beat until moistened. Beat in eggs until smooth. Stir in enough remaining flour to form a stiff dough.
- Turn onto a floured surface; knead until smooth and elastic, about 6-8 minutes (or let your electric stand mixer do the work). Place in a greased bowl, turning once to grease top. Cover and let rise in a warm place until doubled in size, about 1 hour.
- Punch dough down. Turn onto lightly floured surface; divide into two portions, one slightly larger than the other.
- Shape larger portion of dough into an elongated triangle with rounded corners for Santa’s head and hat.
- Divide smaller portion in half. Shape and flatten one half into a beard. Using scissors or a pizza cutter, cut into strips to within 1 inch of top. Position on Santa’s face; twist and curl into beard.
- Use remaining dough for mustache, nose, hat pom-pom and brim. For mustache: flatten and cut ends into small strips with scissors. Place above beard. For nose: Place a small ball above. For hat: Fold tip of hat over and add another ball for pom-pom. Roll out a narrow piece of dough to create hat brim; position under hat.
- With scissors, cut two slits for eyes; insert raisins into slits. In separate small bowls, beat each egg yolk. Add red food coloring to one yolk; carefully brush over hat, nose, and cheeks. Brush plain yolk over remaining dough.
- Cover loosely with foil. Bake at 350°F for 15 minutes. Uncover; bake 10-12 minutes longer, or until golden brown. Cool on a wire rack.
(Adapted from Taste of Home)


What a cute idea! I’m so impressed!
That’s adorable!! Go Nick!
This is so so cute!! I am saving this post!
OH MY GOODNESS, this is so stinkin’ cute. I am soooo signing up to bring bread for every Christmas party I attend from now on! 🙂 What a hit! My boys would love this, definitely going to have to hang on to your recipe. Thanks for linking up… Merry Christmas!
Absolutely adorable! Sam is lucky to have such fun, creative parents! Hope your Christmas was wonderful!
very good sit.