
Since we bought our house last May, I have been searching high and low — literally — for a place to paint a chalkboard wall for Sam. I considered a space in the kitchen beside the refrigerator and another area in the downstairs hallway. But when we decided to convert the basement into a playroom, I knew that was the perfect place for my project. It would be easily accessible to Sam but far enough away that Lucy wouldn’t be tempted to devour the magnets.
I love projects like this one that are aesthetically pleasing to adults and also provide hours of entertainment to toddlers.
Here’s how to add a magnetic chalkboard wall to your home.
Supplies
- level, yardstick, painter’s tape, and pencil to sketch the space
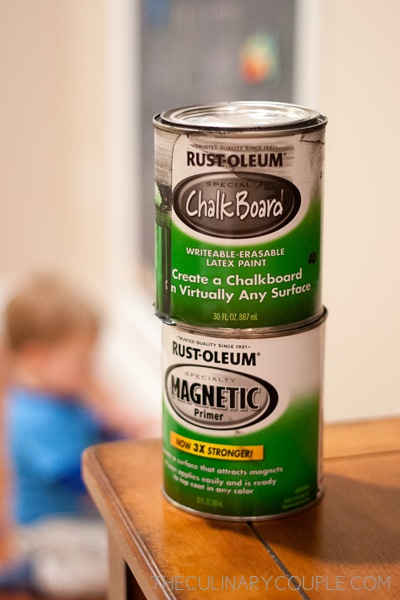
- magnetic primer and chalkboard paint (Rust-Oleum brand)
- small paint roller with two 1/4-inch nap brushes
- white chalk, a soft cloth, and an eraser to prep your board before use (I used sidewalk chalk for this step)
- jumbo triangular chalk sticks (Melissa & Doug brand)
- wooden shapes from a craft store plus magnetic tape to make your own magnets
- magnetic numbers and letters and animals (Melissa & Doug brand)
Instructions
First, use a level and a yardstick to sketch the space you plan to paint. My original sketch was 60″ wide x 42″ tall , but after talking with Nick, I decided to decrease the width to fit within the studs so we could add a frame to it.
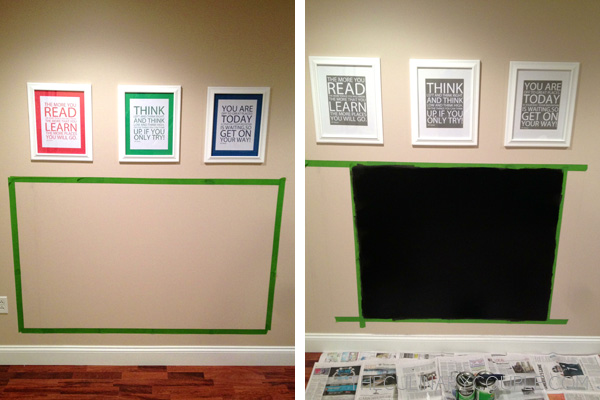
(Yes, I changed the color of our Dr. Seuss prints. The red and green and blue seemed too bright after I hung them.)
When you’re happy with the size, break out the paint. I like Rust-Oleum brand for both the magnetic primer and the chalkboard paint — I found both at Lowe’s. I used a small paint roller with a 1/4-inch nap brush for both layers, however, I did have to toss the brush I used for the magnetic paint because it was far too sticky to even think about cleaning and reusing. Also worth noting: the magnetic paint requires a lot of stirring before you start. And by a lot, I mean at least 15 minutes. Be prepared for a major bicep workout before you even pick up the roller.
Paint (at least) two coats of the magnetic primer, allowing 30 minutes to dry between each coat. Two hours later, paint the first coat of chalkboard paint. Wait two hours before adding the second coat. Allow 24 hours to dry completely.
Then add your frame. We used scraps of window casing that we already had in our garage and painted them to match the woodwork in the room. Nick measured and cut the wood using a saw and coping tool, then he nailed it to the wall with a nail gun. I filled in the corners and nail holes with caulk and touched up the paint.

And ta da! Before you let your kid at it, though, don’t forget to prep the board. Take a white piece of chalk (I used sidewalk chalk), turn it on its side, and rub it across the entire board. This gets messy! So don’t forget to cover the area with a drop cloth or thoroughly vacuum when you’re finished. When the entire board is covered in chalk, take a soft cloth or paper towel and rub it into the board, using circular motions. Finally, wipe it down with an eraser, and you’re ready to go!
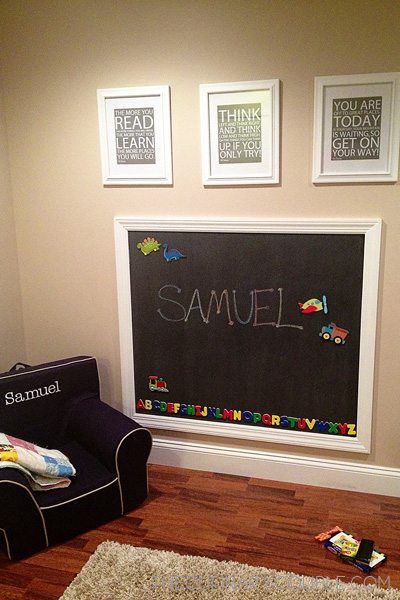
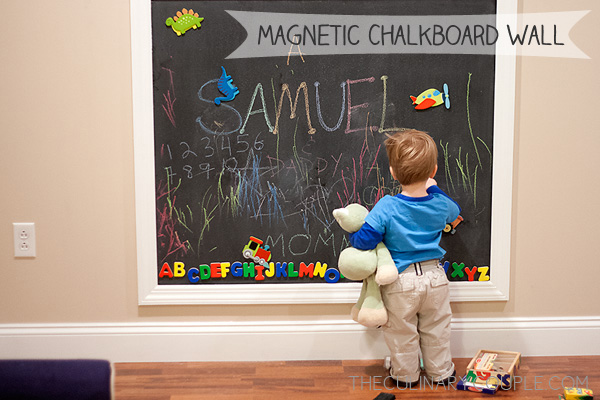
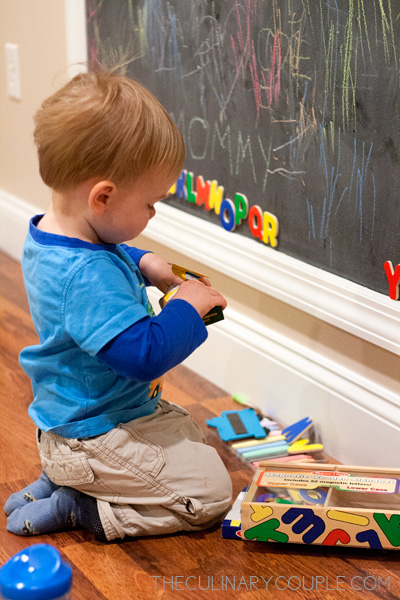
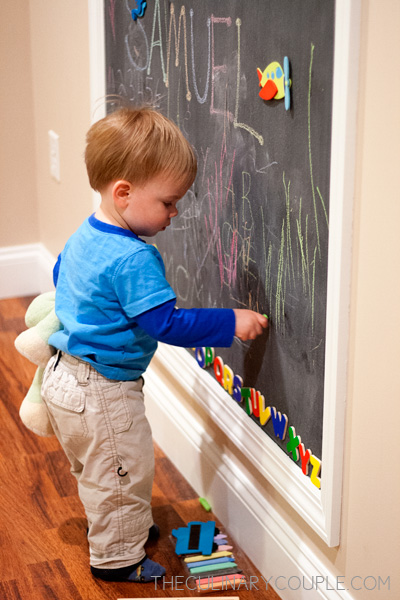
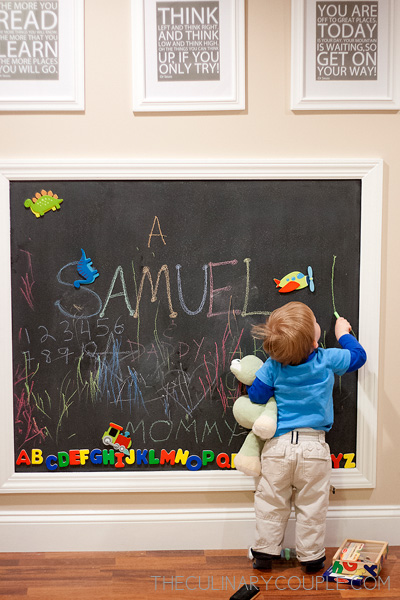
I lined the board with letters and numbers and homemade magnets and wrote “Samuel” across the middle, and I couldn’t wait to show it to our boy. The verdict? He is obsessed.

There are few activities that occupy his attention for more than five minutes, but this is one of them.
And, surprisingly, he’s kept the chalk within the confines of the frame. Though it does get all over his hands and pants. But what’s one more outfit change when we’re already used to him being covered in dirt?
Eventually we’ll use the board to practice our ABCs and 123s, but for now it’s a great space to exercise his creativity. Always with Mr. Ribbit tucked under his arm, of course.
This is one of my favorite house projects to date! Speaking of house projects, we are fast approaching the one-year mark since we bought our home (crazy!), and I plan to do a full house tour next month. Stay tuned!
Amazing!!
I love this so much, Emily! Pinning for our next house.
I plan on using magnetic primer & chalkboard paint on a project in my son’s room. I’ve read pretty poor reviews on the magnetic primer in regards to the smell & inability to hold magnets well. Can you comment on this? It looks like your magnets are sticking.
I had no problem with the primer’s ability to hold magnets. Just make sure to stir it A LOT before painting. And I used two coats before applying the chalkboard paint. Good luck!
I had my paint shaken at the paint store.stirred it a lot and the magnets still won’t stick…is it because I put it on glass?
Great idea. I also do the same for my son.
I bought the Candy Magnetic Paint and Candy Chalkboard Paint in Malaysia (www.candypaintasia.com)
I was told it is more stronger than Rust….
hello, this is such a cool idea. I am interested in doing the same, I am just wondering how the chalkboard actually holds up, meaning does the chalk erase well or leave behind smudges or marks? Also the magnets, I am guessing lighter magnets nothing too heavy, is it pretty sturdy?
thanks for your help,
Janessa
Looks awesome! Did you make the Dr Suess quoted frames? If so, do you have a template to share?
What a great and thorough tutorial. Do you mind sharing the dimensions of just the chalkboard b/4 you framed it up?
I have been planning on this project for my kids for Christmas. Of course, my mother in law has completely poo-pooed the idea because of the chalk dust mess. Do I need some sort of tray to catch all the dust, or will the bottom of the frame take care of that? I don’t know why I even tell her things!
I love this! We are planning to move in the next year or two so I didn’t want to paint the actual wall, I tried something similar but not permanent. Come check it out over at http://bit.ly/1K0hC4X I love meeting with other mommas out there that have similar interest as me.
I did this as well on a wall in the basement. The magnetic paint dis not lay smooth and chalk board eraser does not work on it because of the roughness is left.
Bummer! I’m sorry it didn’t work out for you. I had to mix the magnetic paint for a really long time to make sure it went on smooth. Maybe you can sand it down and try again?
Can contact paper go onto/off the board without causing damage? Kids can stick things made from foam & wood on contact paper. We don’t have a lot of wall space & I wonder if we can plan one more use for the same board. Thank you!
Love this, about to embark myself…
Two questions, why do you “prime” with the layer of white chalk first?
Also, have you tried the liquid chalk? Any thoughts?
Thank you!
I love this. I have been looking at doing something like this for a neice. She will be two in march so will be a great birthday present, she loves her mini chalk board I got her from the pound shop (this was a tester to see if she bothered with it) OH I can’t wait to start it now. Well done
Did you have a textured wall? I taped everything and I’m ready to paint tomorrow however I just thought of the fact that our wall is textured and wondering if that will make a big difference or not
How does it look now that it’s been awhile? I’m trying to decide if it’s worth it lol
What size is your board?
Hi, really loved and appreciate such an elaborate description.. and this has definitely motivate me to execute at my home for Lil Sam.. despite given space constraints…
Hi blogger, i must say you have very interesting articles here.
Your website can go viral. You need initial traffic only.
How to get it? Search for: Mertiso’s tips go viral
so u put the primer then the chalk board u added two layer of chalk board paint right?
I have noticed you don’t monetize your website, don’t waste your traffic, you can earn additional bucks every month because you’ve got hi quality content.
If you want to know how to make extra $$$, search for:
Mertiso’s tips best adsense alternative
I have checked your blog and i have found some duplicate content, that’s why you don’t rank high in google’s
search results, but there is a tool that can help you to create 100% unique
content, search for; Boorfe’s tips unlimited content