While Nick and I are spending time with our Peanut, I would like to introduce you to a few of my lovely blog friends.
Julie and her husband, Peter, recently moved from New York City to Boston. But while they were still in the Big Apple, Nick and I had the pleasure of meeting them for dinner in the East Village. You must check out her blog, Fresh Basil, for craft projects, travel tips, and recipe inspiration.
I am thrilled to be guest posting for Emily and Nick while they spend time with their precious new baby! Most days I can be found over at Fresh Basil writing about cooking, travel and crafty things.
I’ve had a baby blanket project on the docket for months now, but this invitation from Emily to post after Baby Wiley’s arrival was just the push I needed to finally finish.
Inspired by the striped quilt Sherry shared on Young House Love, I knew I wanted to make one myself. However, my crafting sensibilities are decidedly relaxed, so mine is sort of the lazy-girl version.
As always, wash and press all fabric before getting started. Since this project is intended for a baby, I washed it in a Dreft detergent and then ironed.
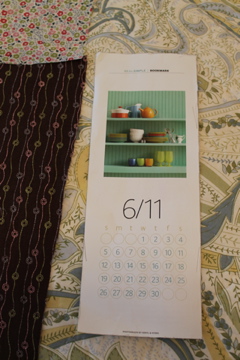
Using the cardboard calendar insert from Real Simple magazine as a template (about 11 x 4 inches), I cut out 12 strips of scrap fabrics in pinks and neutrals with roughly ¼ inch extra on all sides. Of course, you can use whatever fabric you’d like! Depending on the size of the quilt you want to make, you can add extra fabric, or make your strips thinner for more stripes – there are endless variations.
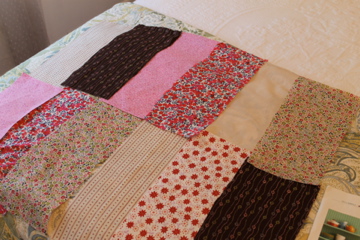
Once everything was cut, I pinned together two rows of six fabric strips and sewed along each line. Then I pressed all seams down and attached the two rows with pins. I sewed those together and pressed down the middle seam. As you can see, I wasn’t worried about each seam being exactly lined up – I like that the stripes are slightly different widths and it didn’t look too perfect. If you’d like yours to even up more, make sure you sew along the line you made when tracing your pattern.
I bought a yard of very soft flannel from the nursery section of my fabric store (the cuteness almost paralyzing!). I put my patchwork piece on top of the flannel and cut along the edge to make the backing. Once cut and pressed, I pinned this to the patchwork, right sides facing each other. I sewed all the way around the perimeter, leaving a two-inch opening in one corner, and used that opening to flip the quilt right side out.
I closed off your seam, and sewed straight lines down each stripe of your blanket to attach the front and back. These stitches are visible, so I did my best to go in a straight line.
This makes a very light-weight blanket, so if you’d like to add more heft, chose a heavier material for the backing or use quilt batting in the middle.
Happy sewing!


Ooh! A new Boston blogger. Good to know. Very cute quilt!
Thanks so much for inviting me to do this, Emily! So much fun.
Happy weekend to the Wiley clan!
Very cute! I tried my hand at some quilting last spring, and I am starting to come to the realization that for babies, I like simplicity best. I love your fabric choices here! Emily and Nick – thanks for sharing yet another awesome friend of yours (I look forward to following you, Julie!)